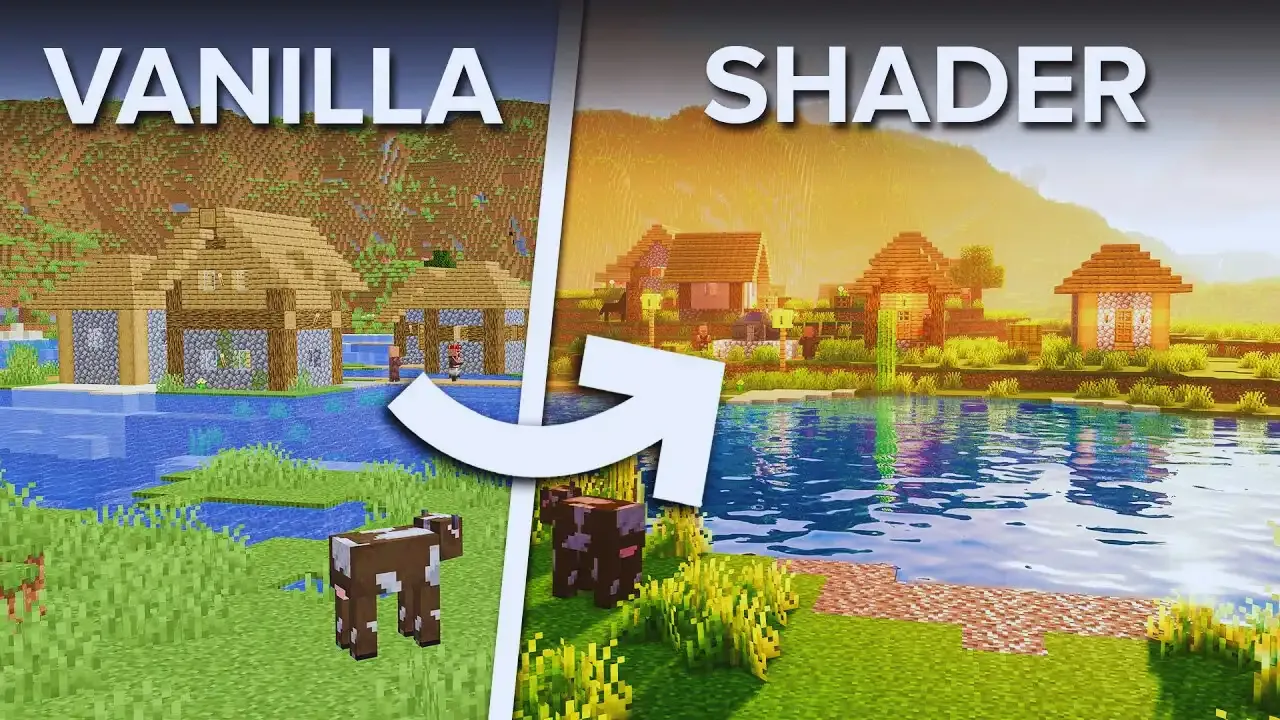
Have you ever wanted to enhance your Minecraft Bedrock experience with shaders but found it difficult to make them work? Shaders can transform your Minecraft world into a vibrant and visually stunning environment, but setting them up can be a bit tricky for windows users. In this guide, I'll show you how to get shaders working in Minecraft Bedrock Edition.

Table of Contents
We'll walk through the steps required to add shaders, troubleshoot common issues, and optimize your settings. By the end of this post, you'll be enjoying a much more immersive Minecraft experience.
Here is a Step by Step Guide:
-
Step 1: Play Minecraft in Preview Mode
The most important step to getting shaders to work in Minecraft Bedrock Edition is to ensure you're playing in the Minecraft Preview. This process won’t work in the regular edition of Minecraft. Here's how to switch:
- 1. Open the Minecraft Launcher.
- 2. In the launcher, click the dropdown arrow next to the "Play" button and select Minecraft Preview.
- 3. If you don’t have it installed yet, you can download it through the launcher.
-
Step 2: Download and Install a Deferred Renderer Pack
The next thing you'll need is a deferred renderer pack - a specialized texture pack designed for Minecraft's preview edition. One of the popular ones is Poggy's Luminous Dreams.
- 1. Download the deferred renderer pack (such as Luminous Dreams) from a trusted source.
- 2. When the file is downloaded, save it to a location where you can easily find it later.
- 3. After downloading, ensure the pack is opened with Minecraft Preview. If you’ve previously used Minecraft's regular edition, the default open option may not be set to preview. To fix this:
- Right-click the downloaded file, select Open With, and choose Minecraft Preview.
-
Step 3: Enable the Render Dragon Feature
Before shaders can be applied, you must enable an important experimental feature within your world settings. This is done through Minecraft’s Render Dragon feature.
- 1. Create a new world, or select an existing world to which you'd like to apply shaders.
- 2. Scroll down to the Experiments section.
- 3. Enable the Render Dragon Feature for Creators option.
- 4. After enabling this, apply the resource pack by navigating to Resource Packs > Owned and activating Poggy’s Luminous Dreams.
You can also tweak some settings for the pack before starting your game by selecting options within the shader settings.
-
Step 4: Activate Shaders in the Video Settings
Once you’re in the world, shaders should be active, but there are a few final settings you need to adjust for everything to look just right.
- 1. Go to Settings > Video.
- 2. Scroll to the bottom and select Deferred Technical Preview under Graphics Mode. This is what will enable shaders to work properly.
Once these settings are in place, shaders should now be visible in your Minecraft world!
-
Step 5: Adjust Your Graphics and Brightness Settings
While shaders can make your game look amazing, they can also sometimes make things like brightness a bit too extreme. Here's how you can adjust these settings:
- 1. Go to Settings > Deferred Graphics Options.
- 2. Adjust the Brightness to a level that makes the game comfortably visible.
- 3. You can also tweak other settings such as Anti-Aliasing, Volumetric Fog Quality, and other options that control how shaders behave.
For example, lowering fog quality can improve performance on lower-end devices. Feel free to experiment with these settings until you find the perfect balance between quality and performance.
-
Step 6: Ensure Your Device is Set to High Performance
If you still experience issues with shaders not working or your game not running smoothly, it might be due to your device’s performance settings. This is especially common on laptops or mobile devices.
- 1. Type Graphics Settings in your device's search bar.
- 2. Open the settings and find the Minecraft Preview app from the Microsoft Store App dropdown menu.
- 3. Select Options and ensure it’s set to High Performance.
After making this adjustment and restarting your computer, your Minecraft Preview should run better, and shaders will work more effectively.
Bonus Tip for Console Players:
While shaders for Xbox and other consoles are still in a gray area, some players have reported that joining a server or realm hosted by someone running shaders can sometimes allow you to experience them. This workaround isn't guaranteed, but it's worth a shot if you're on a console.
Troubleshooting Common Issues:
If your shaders still aren’t working after following these steps, here are a few things to check:
- Device Compatibility: Some lower-end devices, especially mobile phones, may not be able to handle shaders. In such cases, try lowering the graphics settings further or checking online if your device is compatible.
- Correct Installation: Double-check that you’re using the Minecraft Preview version and that the shader pack is properly activated.
- Graphics Mode: Ensure you’ve selected Deferred Technical Preview in the video settings. Without this, shaders won’t display.
Conclusion:
With shaders, Minecraft Bedrock Edition transforms into a visually stunning game with realistic lighting and textures. By following these steps, you can unlock this experience for yourself. Remember, the key to success is using Minecraft Preview, having the right shader pack, and tweaking your settings for the best experience.
Now it’s your turn! Try out shaders, and let me know in the comments if you encountered any issues or if shaders are working perfectly. Happy crafting!
Call to Action:
Found this guide helpful? Share it with your fellow Minecraft players and comment below if you have questions or want to share your experience with Minecraft shaders! Also, check out my other posts for more Minecraft tips and tricks.